Step 1 Review
Table of contents
Let’s start the development of our vending machine algorithm with the elements we used in the first assignment. For instance, we need to welcome the users and tell them what is available, ask them to choose a hot beverage and tell them their choice.
Hot beverage algorithm 1
1
2
3
4
5
6
7
8
9
Tell the user 'Welcome to IDE Hot Beverage service!'
Tell the user 'Here is what we offer:'
Tell the user '1) Coffee'
Tell the user '2) Tea'

Create a variable called choice of type number with the initial value 0
Ask the user 'Type in your choice: ' and store the answer in choice
Tell the user 'Here is your ' choice
Tell the user 'Have a great day!'
You will recognise the ‘keep in memory’, ‘input’ and ‘output’ algorithms. However, feel free to tune the way you ask and tell the user: this is your vending machine.
Note that we now put "Here is your" and "choice" on the same line. As we saw in the first assignment, we can ‘add’ strings (i.e. pieces of text) together with the plus +. We call this operation ‘concatenation’.
Task 1.1: Create a project
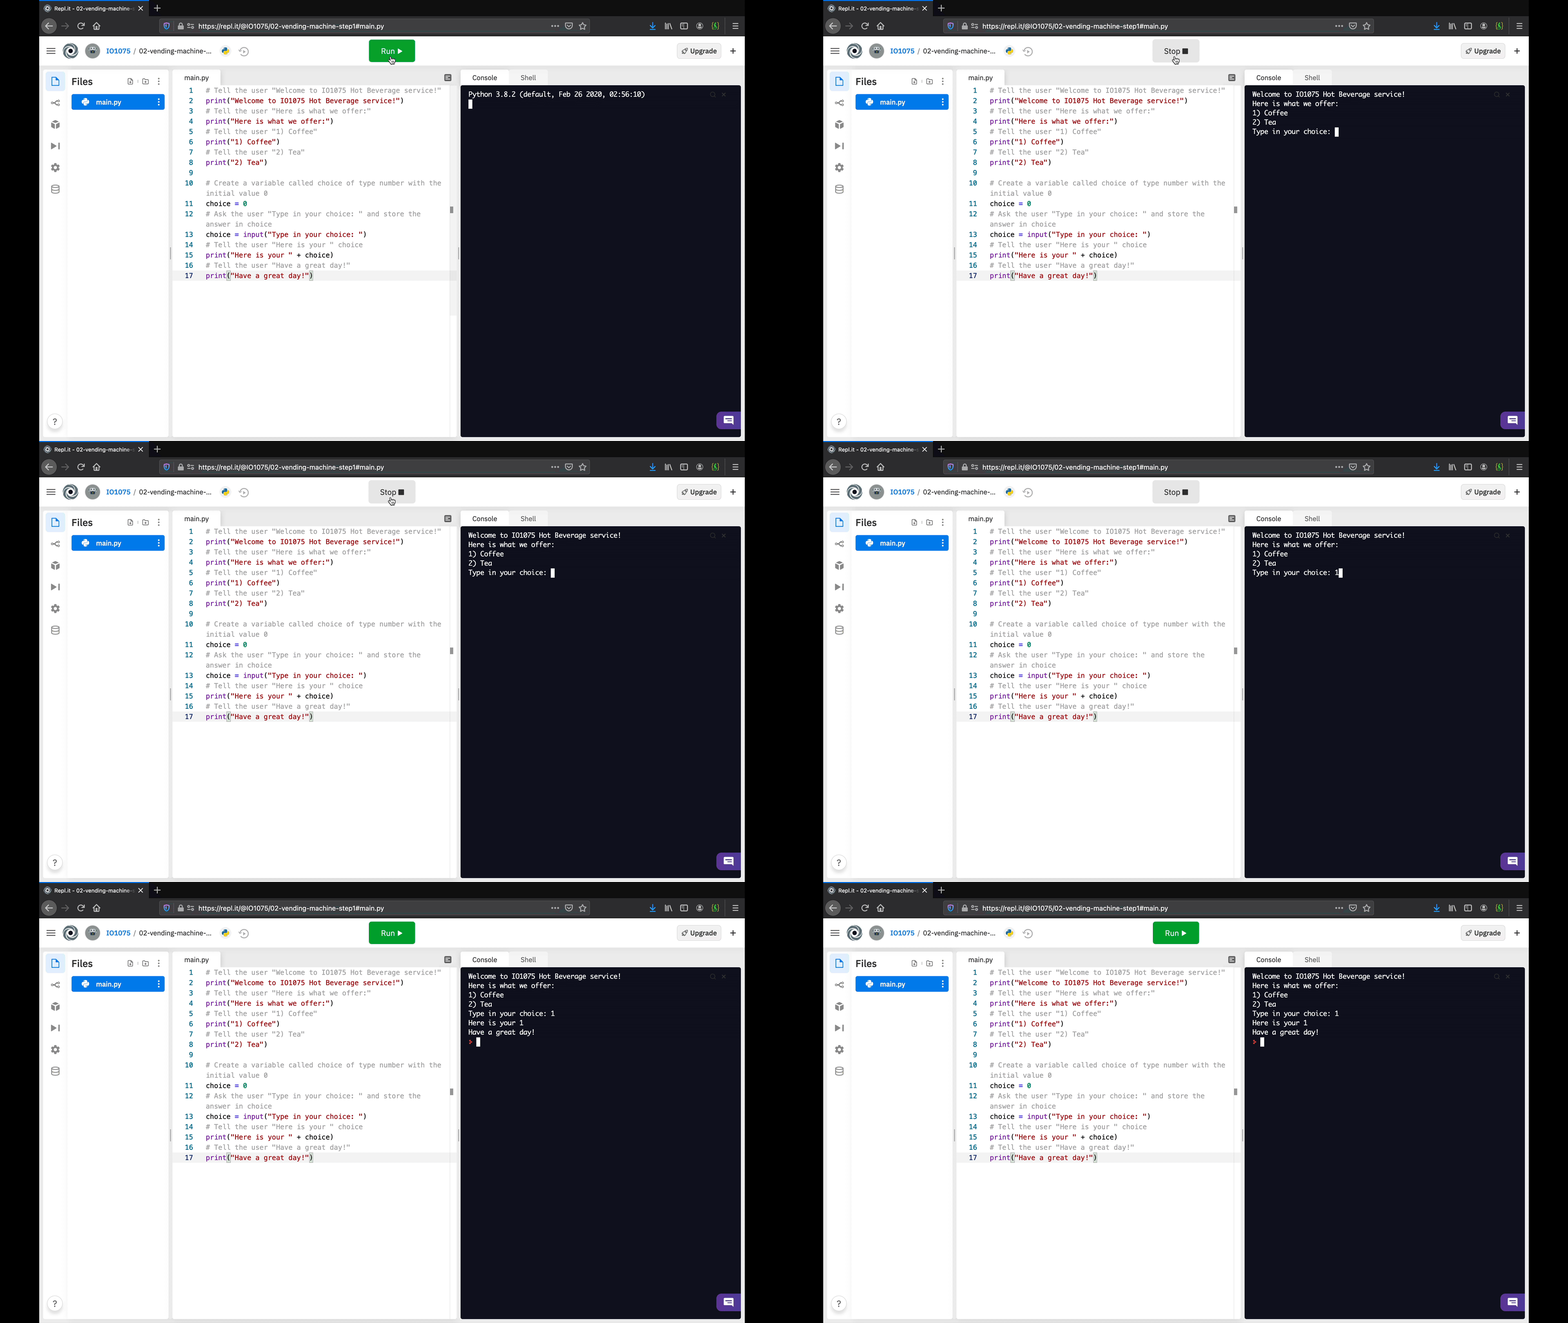
Open Replit in your web browser and create a new Python project with the name ‘02-vending-machine’ and write the ‘Hot beverage algorithm 1’ as comments (adding the hashtag # in front of each line).
Task 1.2: Write the Python code
The next step is to write the Python code for each comment. Do not hesitate to revisit the first assignment if you forgot about the Python syntax.
Task 1.3: Execute the code
The first version of your vending machine algorithm is ready! Now, execute the code to check that it behaves the way you expect.

Once you achieve a similar behaviour, there are a few things that we can improve. First, let’s focus on the choice: the response to the users is (directly) what they type, such as 1 for coffee or 2 for tea. In the next step, we will use branches to do specific actions based on the users’ choice, such as providing a more comprehensive message.